
For all those short on a Halloween costume this year, here is a DIY Tusken Raider mask you can make from Star Wars.
For this you will need the following materials and equipment:
- Corrugated Cardboard (comes free with most packaging)
- Newspaper (roughly £2)
- PVA Glue (£5)
- Hot Glue (and Hot Glue Gun, perhaps ask Mr Brooks if you can borrow one from the art department)
- Scissors or a Box Cutter/Stanley Knife
- Metal Spray Paint (£6)
- Toilet Roll Tubes (presumably already in possession of)
- Egg Box (presumably already in possession of)
- Calpol Syringes (you may have some collected, the syringes comes with bottles of Calpol, and Calpol is usually less than £4)
- Faux leather (costs £5 from a local haberdashery – such as the one in John Lewis at Leeds, or The Remnant House on Commercial Street in Harrogate)
- Leather belts (best are found at Primark, £4, buy XL as it’s the same price and gives you more material)
- Cream fabric material (also around £4)
- (note, for all fabric if you can find offcuts you can get it at a cheaper price)
- Total rough cost, £36 – can vary however
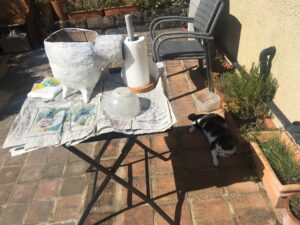
Step 1: Basic foundations.
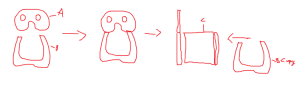
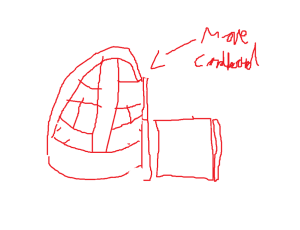
Firstly, you will need to cut out a bit of cardboard, roughly in the shape of an Xbox Controller, with eye holes cut out (A). After this, you will need to attach a U-shape bit of cardboard to this (B), so that it somewhat looks like a Tiki Face. After this, you want to wrap a section of corrugated cardboard around the U-shape (C), then stick a copy of the U-shape on the end of this:
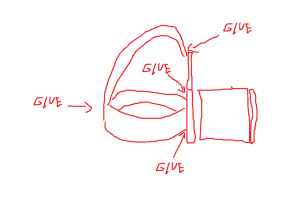
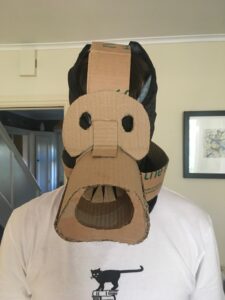
After this, you may want to glue a support between section C and the original section B. You then want this to sit on your head. To do this, you glue extra cardboard bits to form a structure that is visually similar to the mask Bane wore in The Dark Knight Rises:
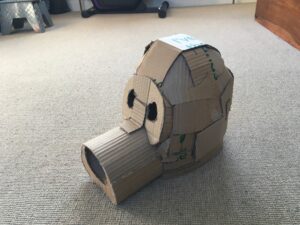
So far, your mask should look like this:
You will also need to place a roll of cardboard with triangle edges folded inwards inside the mouthpiece. This will be used later on. After this, you can start to glue more bits of cardboard around the mask:
Your mask should now look similar to this:
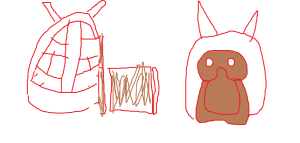
Once you’ve reached this point, you can start to paper mâché the mask. You do this by dipping bits of newspaper in a mix of water down PVA glue, then placing it on your mask, waiting for it to dry, building it up layer by layer. If you are unhappy with the shape of your mask, you can change it with paper mâché. You will want to do this a few times to make the mask stronger. At this point, you can also get your egg box to make the Tusken Raider’s famous horns. To do this, cut the prongs out of an egg box, and stick them to the mask. You will do this four times to copy the look of a Tusken Raider:
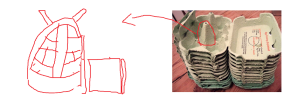
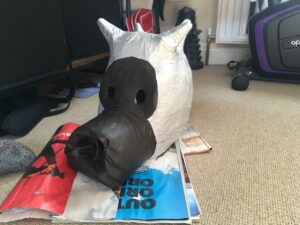
After this, you can paper mâché over the horns. The mask should now resemble something like this:
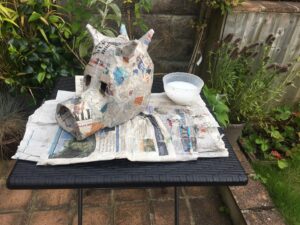
After this, you will want to do a final paper mâché layer of the mask in kitchen roll, to get a base white colour. You may want to change your ratios of glue to water for this, but it’s really down to experimentation:
At this stage you can start to spray paint the mask with a grey-metallic spray. Once the spray has dried, you can place some of your leather material over the mask. The diagram below shows how you would do this. You would want to do this in whole sections for the Xbox Controller part of the mask and the snout. The leather will go into the mouth of the mask, and here you may want to use several pieces to give you mask a crumpled look. You don’t have to worry about parts of it being seen on the snout, as the snout will ultimately get covered over:
Your mask should ultimately resemble something like this:
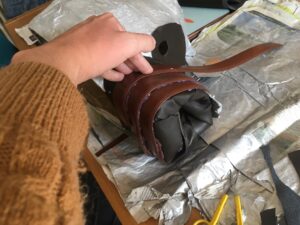
You can now start to glue your leather belts around the mask. This will require a lot of patience and hot glue. Cut the belts up into strips that make one loop around the mask and then stack them on top of each other. Cutting the belts in half will help with the rough proportions. Here is the process of layering the belts on the snout:
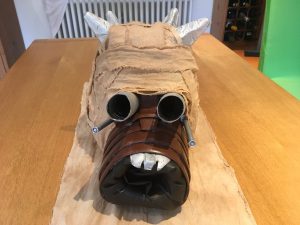
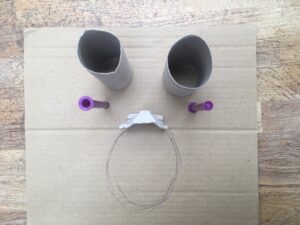
Continue to wrap until the belts entirely cover the snout of the mask. Once this is done you can start to think about the mask’s details. You will take your toilet roll tube, calpol syringes and a bit from your egg box, to spray and adapt them. This is what it looks like before:
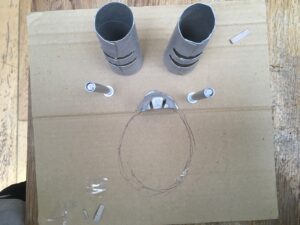
This is what it should look life after:
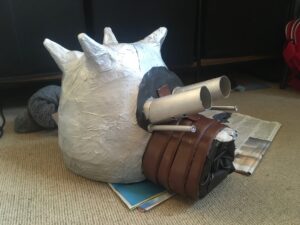
You can then glue these onto your mask. It should look something like this:
This is the final stage before you wrap the mask in your fabric. You may want to age your fabric slightly overnight by putting it in a pot with tea bags, left to simmer over a medium heat, and then dry them out in the morning. Once you are happy with your material’s appearance, you can tear it into strips and place them around your mask. The end result should resemble this:
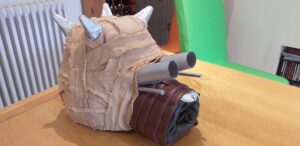
And there you are – a DIY Tusken Raider mask! This was a whistle stop tour through the stages of making such a mask, and if you want any more advice then I would recommend watching this video (https://www.youtube.com/watch?v=5KvfpfGOc2c) which will give you a better understanding visually of the process. Hopefully this has inspired you to make your own Tusken Raider project, or to make your own mask for Halloween. Either way, making a mask can be a thoroughly rewarding experience, and you end up with an object that visually looks extremely good. Happy making!